PHOTO WALL STANDARD CREATION INSTRUCTIONS
THE OPIQO 3 STEP GUIDE TO CREATING YOUR PHOTO WALL STANDARD MASTERPIECE
BEFORE YOU START: Opiqo photo stickers will stick to most clean flat surfaces & even to some textured surfaces. For freshly painted walls allow a 3 week drying period.
Before applying you should make sure the surface is clean and dust free.
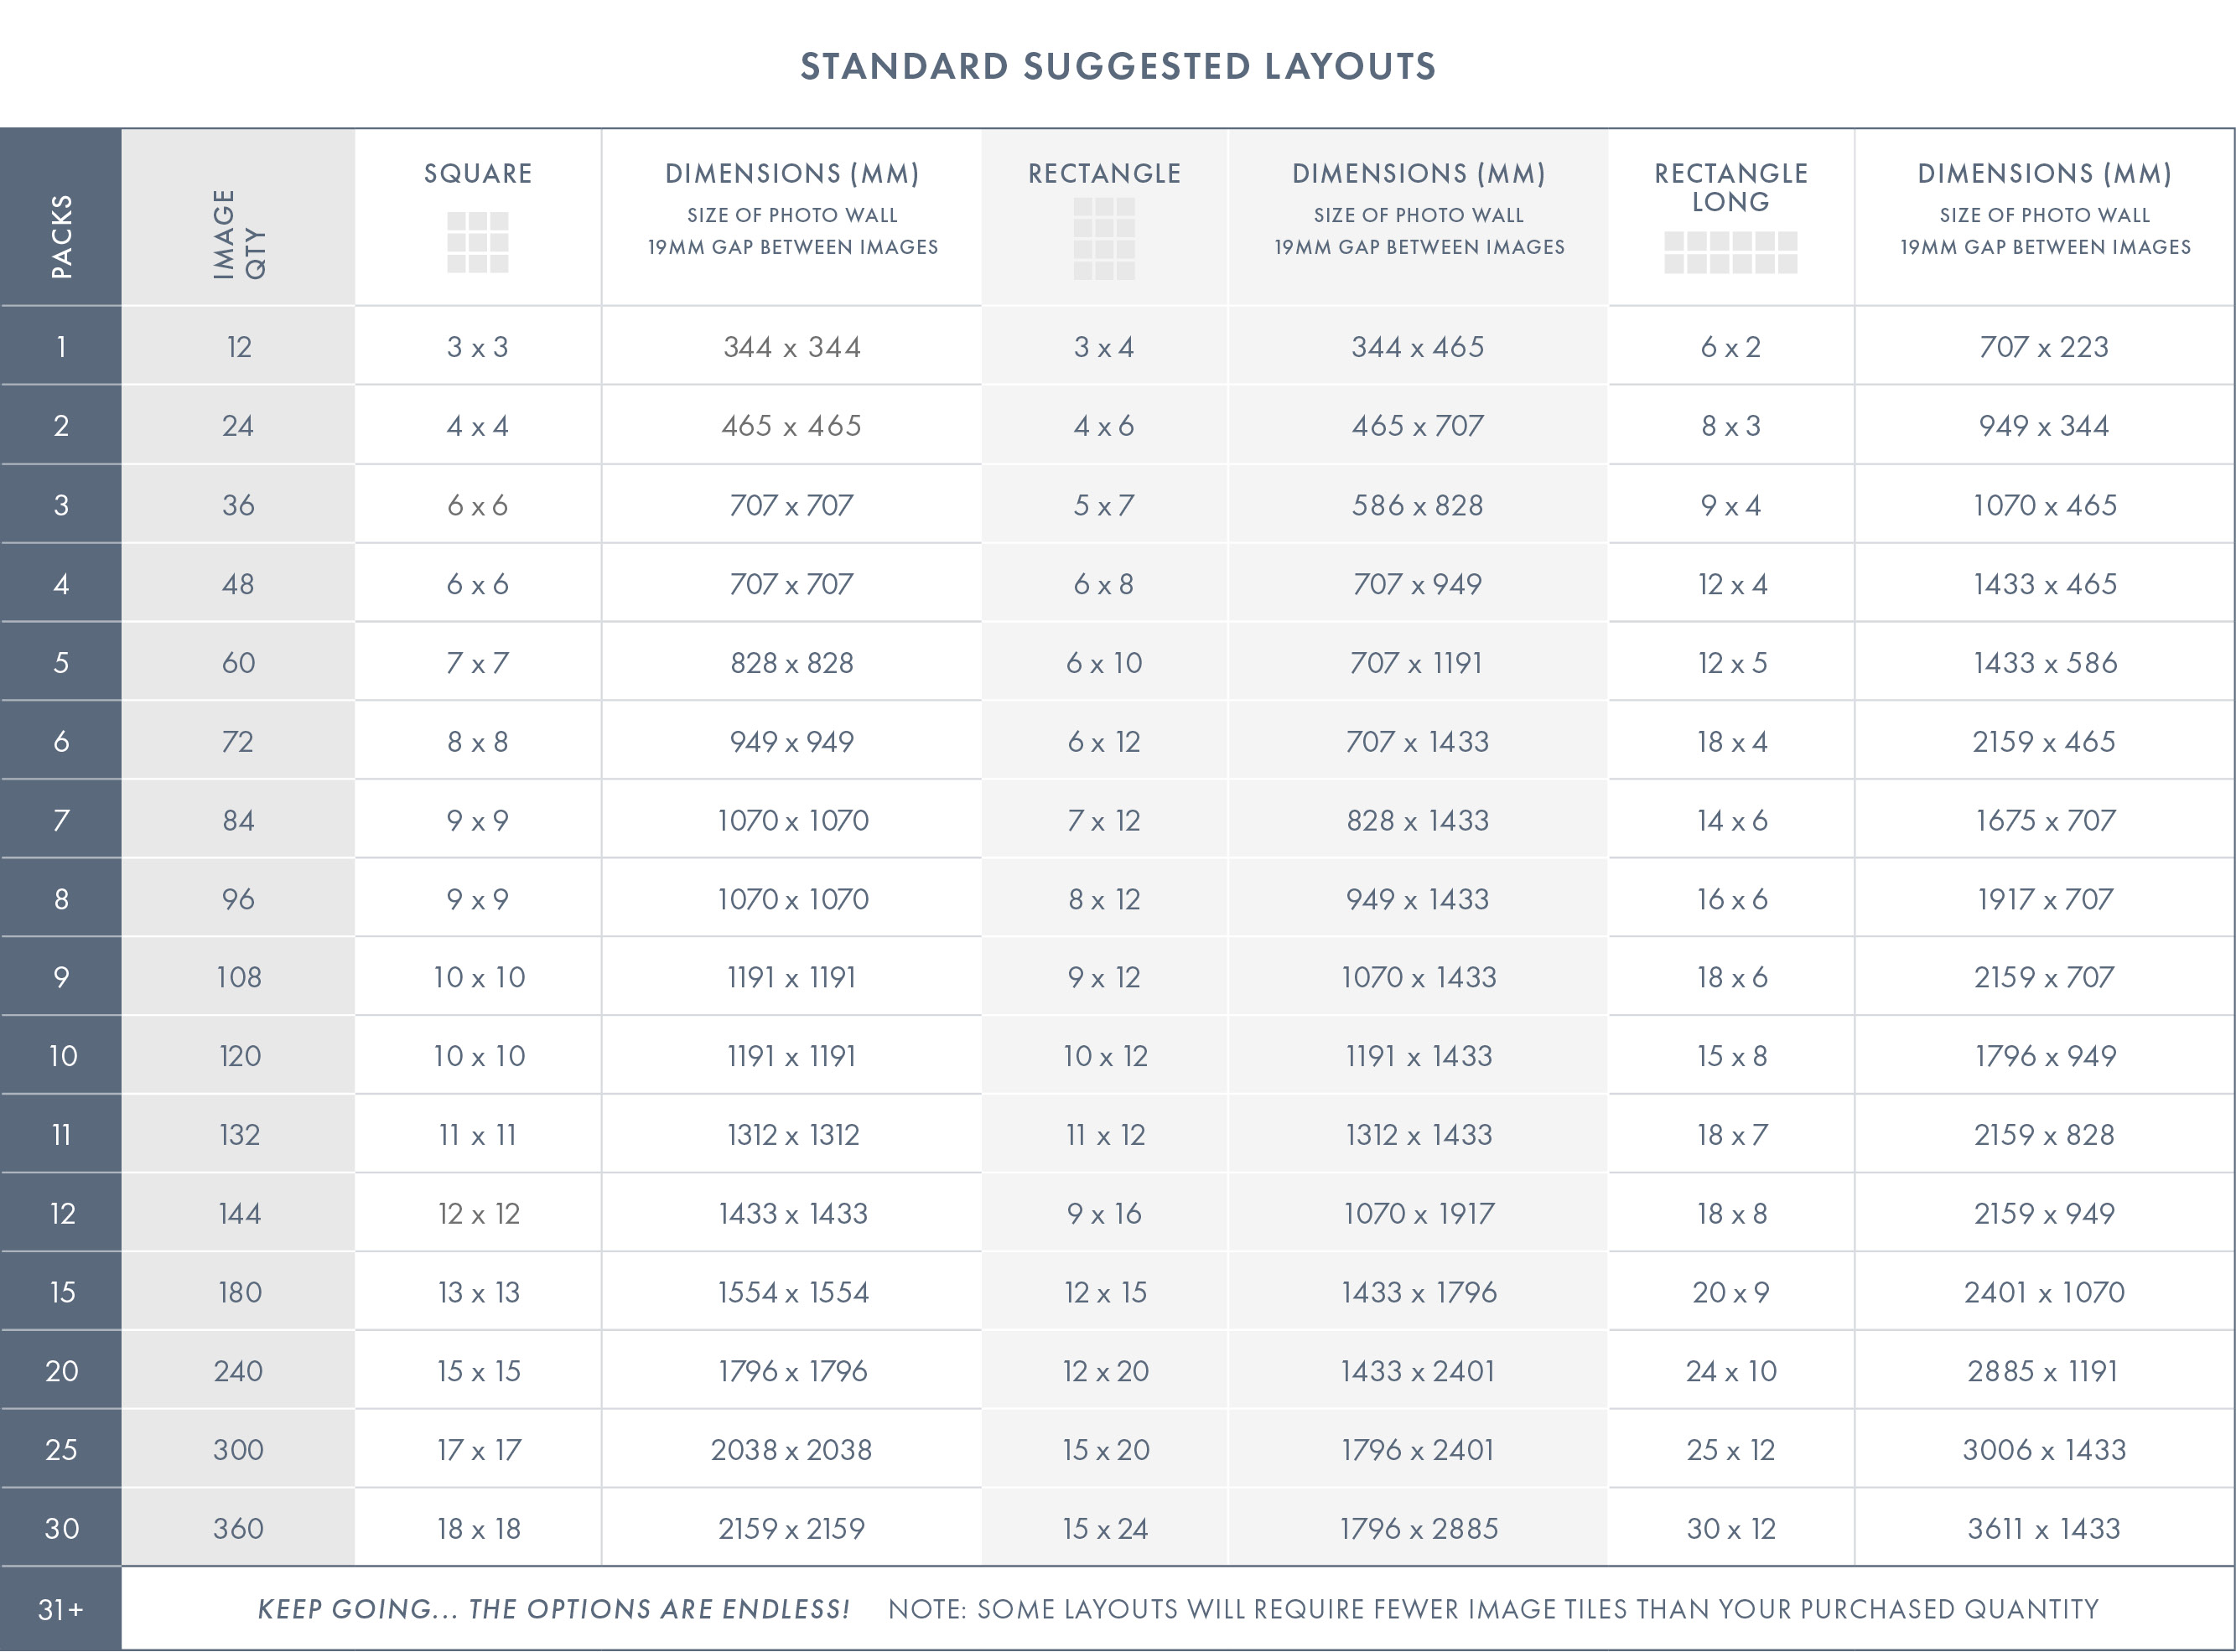
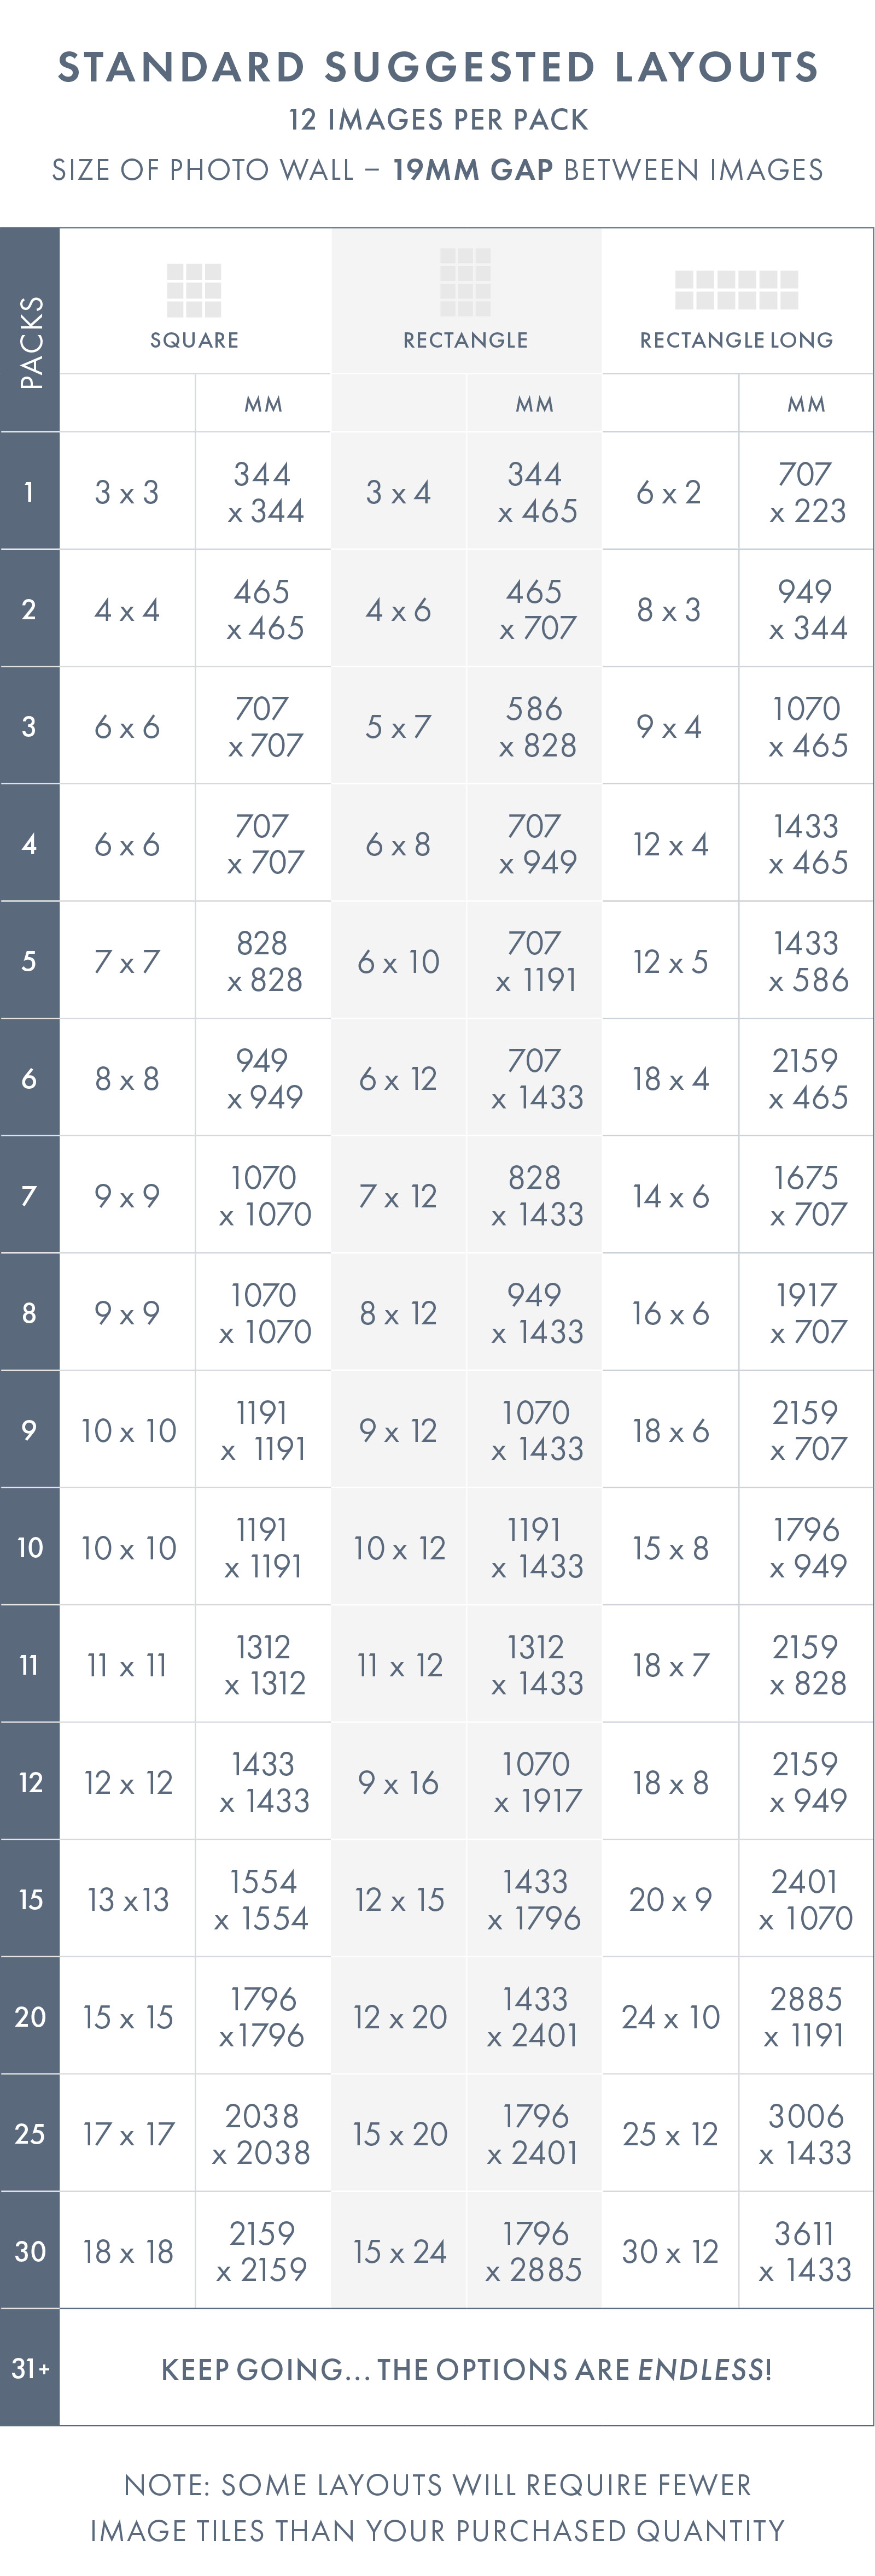
STEP 1. Choose a layout of rows & columns and the corresponding dimensions using the Photo Wall Standard Size Guide (shown below).
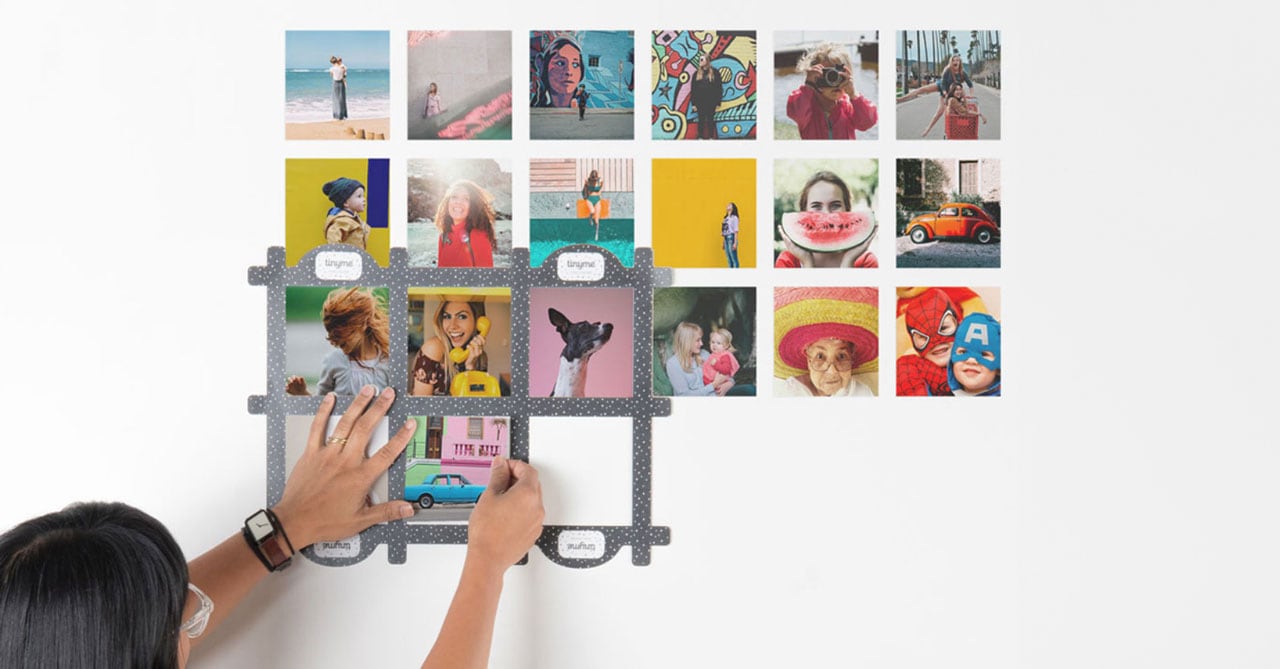
STEP 2. Determine where on the wall you would like the first photo and stick Terry Template to the wall. Measure off the ceiling or floor, or use a spirit level to help get Terry Template straight
STEP 3. Insert your photos into the Terry Template squares. Move Terry Template across and insert more photos until the row is done. Move Terry Template down to repeat and finish your masterpiece
TAKING THE STICKERS DOWN: To remove, carefully lift a corner & whilst folding the sticker back on itself, slowly peel off. Our photo stickers shouldn't damage your wall, but it is important to be careful when removing in case the wall has been poorly prepared before painting. If you are concerned, or if the wall offers resistance, heat with a hairdryer while removing. The backing paper is a good place to store your stickers.
Login and Registration Form